
How true is M1’s true speed 2.5Gbps fibre broadband?

M1 offers 4 types of broadband services. Screenshot from M1’s website.
I have been a long-time user of Singtel’s fibre broadband service. It was natural for me to choose it as my fibre broadband provider when I moved to my own home 2 years ago, when I signed up for the 1 Gbps plan that cost $53.70 per month.
My 2-year contract was up and I decided to look at their recontract options. I was hoping the 1 Gbps plans would have become cheaper since nowadays, telcos are promoting new and faster speeds of up to 10 Gbps. To my disappointment, they have decided to remove the 1 Gbps plans and the next lowest speed plans are 2 Gbps, which starts from $43.90 per month. Unfortunately, I did not qualify for this price because it is only for new sign-ups. Instead, I would have to pay $55.70 per month to recontract. More importantly, it is not a true 2 Gbps speed as each LAN port on the Optical Network Terminal or Router (ONT or ONR) is capable of delivering 1 Gbps speed. Thereby, you will get a combined 2 Gbps speeds. This was when I decided to look elsewhere for a better offer.

Singtel basic fibre plans start from 2 Gbps Enhanced plan, which costs $43.90 per month during the 24-month promotional period for new sign-ups but $55.70 per month to recontract. (Screenshot from Singtel’s website).
After researching online and in forums, I decided to switch to M1 fibre broadband, which is offering a true 2.5 Gbps plan, and only costs $39.90 per month. It includes an ONT (HUAWEI HG8240N) and a free WIFI-7 ready router (TP-Link BE230). Unlike Singtel and Starhub, M1 offers a plan without the freebies, which are nice to have but can become a hassle to cancel when the offer expires.

M1 broadband plans start from HomePac 1 Gbps and up to 10 Gbps. The above screenshot taken from M1’s website is for the HomePac 2.5 Gbps plan at $39.90 per month during the 24-month promotion period.

M1 promises a true 2.5 Gbps speed for the HomePac 2.5 Gbps plan.
How true is M1’s 2.5 Gbps fibre service? According to their website, it shows it is possible to achieve speeds of between 2084 Mbps and 2267.4 Mbps, and the test was carried out between July and September 2024. Of course, they also state that it uses a direct wired connection from their computer to the 2.5Gbps WAN port on the ONT. You can read more about it via this link.

M1 publishes its testing results for each broadband plan. (Screenshot from M1).

The plan comes with a 2.5 Gbps capable ONT from Huawei (left) and a TP-Link BE230 wifi-7 router (right). In addition, the above setup was used in two of the five tests.
Unfortunately, I am unable to completely replicate this. I am not able to directly connect my LAN cable from my Macbook to the ONT. Instead, I would have to conduct the test via my router, which is the usual setup for the majority of users. I would be using the Speedtest app, which is available for download as an app on the MacBook, for all the tests that I would carry out in this blog. I would also be using the same server on the Speedtest app for all the tests. For the wired connection from my laptop to the router, I used a Wavelink USB-C to RJ45 adaptor that is capable of delivering 2.5 Gbps speed. Here a link to purchase one if you are interested in getting it (Click here for Shopee and Lazada).

I used this 2.5 Gbps capable adaptor from Wavlink to test the LAN connection speed from the router to my Macbook.
Here is the list of tests:
Wifi 2.4 GHz with the router connected to my ONT via a RJ45 data outlet on the wall in the living room.
Wifi 5 GHz with the router connected in the same way above.
LAN (wired) connection from the 2.5 Gbps data outlet on the router to my Macbook, which is connected via a 2.5 Gbps capable USB-C to RJ45 adapter.
Wifi 5 GHz with the router connected directly to the ONT using a LAN cable, which is connected to the 2.5 Gbps data outlet of the ONT.
LAN connection from the 2.5Gbps data outlet on the router to my Macbook, connected via a 2.5Gbps capable USB-C to RJ45 adapter. The router is connected directly in the same way as point 4.

The result of the first test using 2.4 GHz wifi bandwidth.
For the first test, I got 123 Mbps download speed, when I use the 2.4GHz wifi signal. It is definitely much lower than 2.5Gbps but then to watch a 4K resolution drama or movie on Netflix or other streaming providers only require 25Mbps. This assumes only one user is watching at home. If there are more than one and each of them watches a 4K drama or movie, the 2.4Ghz bandwidth could become overloaded and the wifi experience would become less than satisfactory.

For the second test, I got better download speed using the 5 GHz wifi bandwidth.
For the second test, I got 787 Mbps download speed using a 5 GHz wifi signal. Usually, this is the bandwidth we would use for our smart tv and laptops. But unlike 2.4 GHz, it has a short frequency, which could affect its ability to reach places faraway from the router. The workaround is to install a wifi mesh or another router in your house. On the other hand, it is faster and better at avoiding interfering signals such as other routers and wireless devices.

I got the highest speed of 1.95 Gbps using a wired connection from the router 2.5 Gbps LAN port to my MacBook via the 2.5 Gbps adaptor.
For the third test, I got 1948 Mbps (1.95 Gbps) download speed using a wired connection. This is the best speed test so far and it should be expected, as a wired connection is not affected by the interferences in the open environment or the need to penetrate through walls. Unless you still use a LAN connection to access the internet for home or work, most of us use wifi to do that now. As a result, we will not be able to experience the fastest speed that a 2.5 Gbps fibre broadband offers.
In case some ask would the download speed become faster if I connect my router directly to the ONT via a LAN connection. I have repeated the same tests above in the tests below.

Using the same 5 GHz wifi bandwidth but this time, the router was connected to the ONT using a LAN cable. For previous tests, the connection was from the wall RJ45 data outlet.
In the fourth test, I have connected the router to the ONT using the LAN cable and I make sure both ends of the cable are connected to the 2.5 Gbps port. I got 832 Mbps download speed, which is slightly better than the third test.

I could again achieved the fastest broadband using the same wired connection.
Finally for the fifth test, I got 1951 Mbps (1.95 Gbps) download speed using the wired connection. This is about the same speed that I would get if my router was not connected directly to the ONT.
From the five tests above, I can deduce three things. First, it does not matter whether the router is close to the ONT. This is because the third and the last tests have shown the speed is not affected. Instead, we should prioritise the location to place the router inside the house.
Typically, it should be placed in the centre of the house, which is likely to be in the living room near the tv console. If you are worried that the wifi will be interfered by all the electronics at the tv console, it would not be a major problem, as the second and the fourth tests have shown the speed difference is only about 6%, which is a small difference for a normal user, who relies on it for browsing and watching shows on streaming platforms.
Second, I am able to get close to the lower range of the typical broadband speed that M1 has stated on their website. The catch is I will only get to enjoy most of the 2.5 Gbps service on a wired connection, which would bring me to my third and last deduction.
Third, majority of us will never be able to enjoy the full aspect of the 2.5 Gbps service, as we use wifi to access the internet anywhere inside the house. It would only make sense if we are still using desktop computers, which I still think uses a LAN connection to access the internet.
In conclusion, M1’s 2.5 Gbps true speed fibre service is more like a 2 Gbps speed. At $39.90 per month, I think it is still cheaper than Singtel’s not so true 2 Gbps plans. I would like to highlight that M1 seems to be also the only Telco that offers 2.5 Gbps in the market. If you are considering to switch to this, I would say it is a good plan in terms of real upgrade in speed compared to 1Gbps and at an affordable price bracket too. Although we will not be able to get close to 2 Gbps while using a wifi connection, you sort of really get what you paid for. On the other hand, for users who are still comfortable with their existing 1 Gbps or slower speed plans, please bear in mind at this moment, you could be paying more than the newer and faster plans. In my case, I was able to enjoy a savings of $13.80 per month compared to my previous plan with Singtel by switching to M1 and upgraded to a faster speed plan.
If you ask me whether to upgrade to a 3 Gbps and above speeds, and using WiFi most of the time? Maybe not.

How to cash out your NS LifeSG credits

National Servicemen will progressively receive $200 NS LifeSG credits from Nov-2024 (Screenshot from ns.gov.sg)
From Nov-2024, Singaporean who are serving National Service (NS) including those enlisting by 31 Dec 2024, past and present Operationally Ready National Servicemen (NSMen) will each receive $200 into their LifeSG accounts.
This initiative was announced during Budget 2024 in Feb-2024. It is to recognise the contributions of national servicemen to Singapore’s defence and security.
Eligible servicemen will receive a text from gov.sg to inform them it has been disbursed. It can be used at any merchants that accept payments via PayNow UEN QR or NETS QR.

Eligible Servicemen will receive a text from gov.sg with either the MINDEF or MHA handle to inform them about the credit disbursement.
What if you prefer to use it in wherever you want? In this blog, I will be sharing how you could do just that. You can transfer the credit to a Youtrip account and then transfer it to your designated bank account.
But first, you will need to already have a Youtrip account but if you do not have one, you can sign up for one by clicking here to use my referral link. You will get a $5 reward after you make your first top-up to your account. You can then use your own referral link and share it with your friends. Once 10 of your friends signed up and made their first top up, you will be rewarded $50!

You will be rewarded for each friend you referred to Youtrip and an additional bonus if you managed to get 10 friends to sign up and top-up their accounts.
Youtrip is a multi-currency stored value card much like an ezlink card. With its very attractive exchange rates, which you can reference with the rates on xe.com or on google, you can use it for your travels by topping up any amount of SGD you prefer and convert it to your desired foreign currency.
Transferring the credits to the Youtrip account and then transfer to your desired bank account, offers the simplest and quickest way to get access to the funds. If you are traveling, you can choose to keep it in the Youtrip account and use it for your holiday expenses.
First, ensure you got both the LifeSG and Youtrip apps downloaded on your phone. Otherwise, please go to App Store or Google Play store to download them.


Second, open the Youtrip app on your phone and generate a Paynow QR code, which will be used to transfer the credits from LifeSG to your account. Tap on Top-up and enter the amount, in this case it would be $200. In my case, I will transfer all $146.28, as I have used some of it on my Shopee purchase during the 11.11 sale.

Tap Top Up to start the process.


Third, go to your LifeSG app and scroll down until you see the NS LifeSG credits. Tap on scan QR code to pay and enter the amount you want to pay to your Youtrip account. Slide to confirm and you should be able to see the payment success page.


Fourth, go back to the Youtrip app and the NS LifeSG credits should be in your account now.

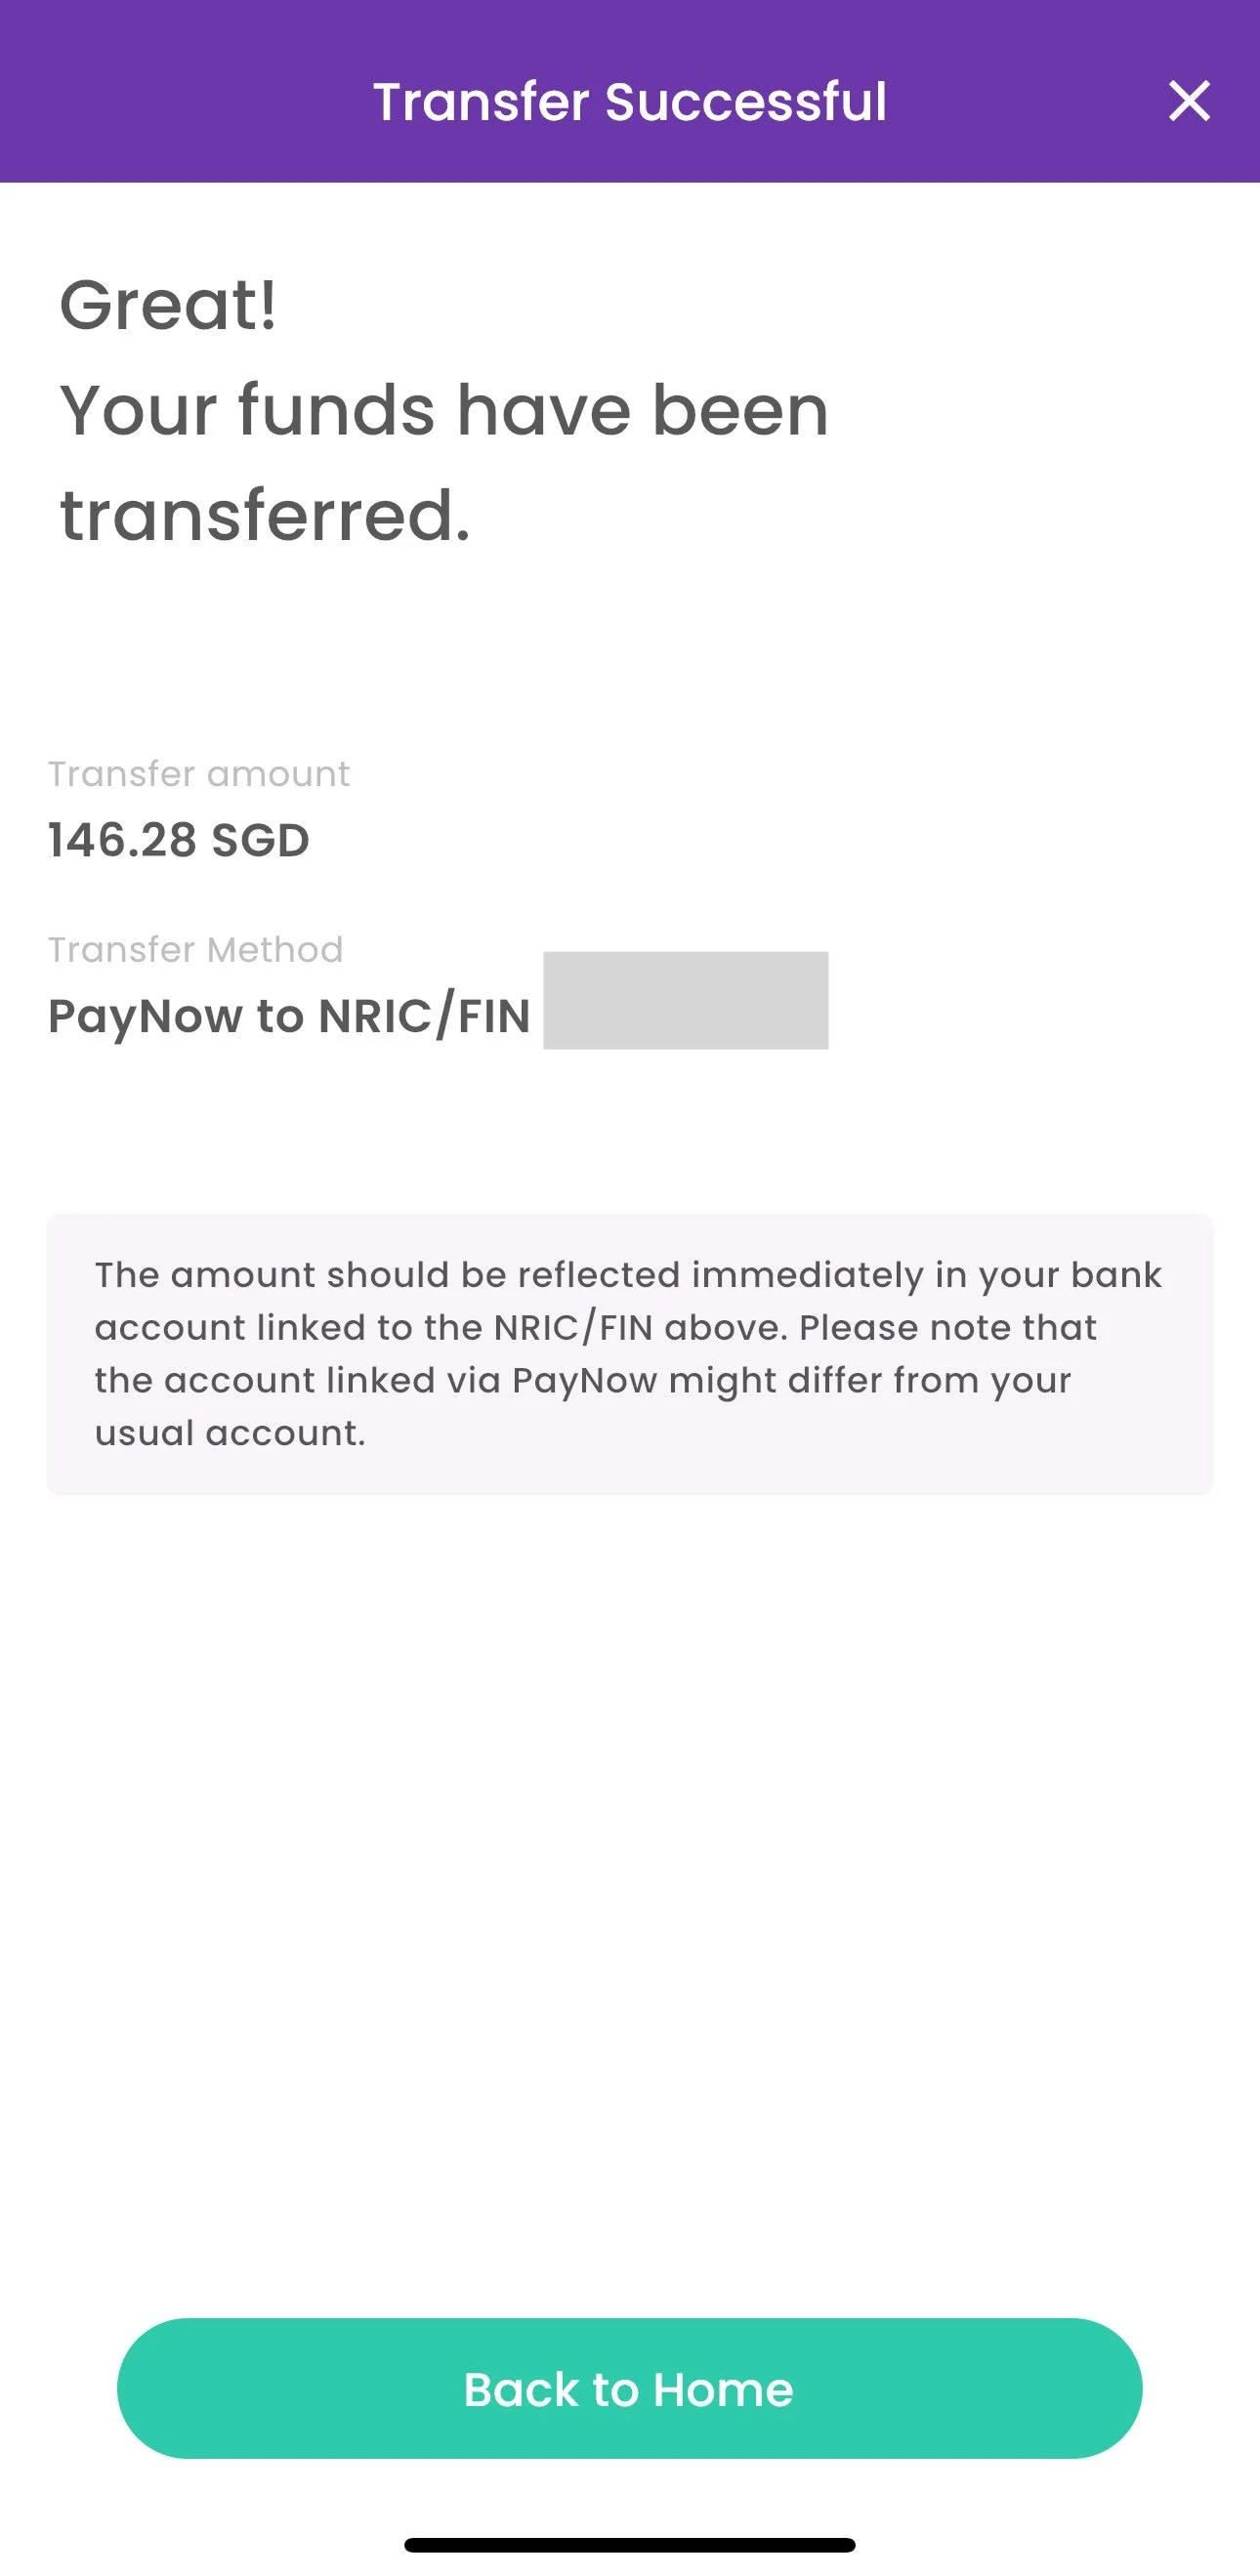
The funds will be in your Youtrip account after the transfer is successful.
Lastly, tap on Transfer. There are two options and they are either Paynow to your registered mobile number or NRIC. This is the only way to withdraw the funds in the Youtrip app.


In just five steps, your funds would be in your designated bank account and you are now free to use the funds wherever you want. Do remember that the credits left inside the LifeSG app will expire on 31-Oct-2025, so transfer them before it is no longer valid.

My Business Class Experience with Singapore Airlines
On my recent trip to the United States, I booked myself on the world’s second longest flight operated by Singapore Airlines from New York (Newark Airport) to Singapore. It is an 18 hours 45 mins flight and I thought it would be the best opportunity to experience the business class product onboard.
Long haul business class seat on Singapore Airlines’ A350 Ultra Long Range plane.
Singapore Airlines (SQ) business class is broadly separated into three categories - long haul, A-380 business and regional. The airline also offers business class on its 737-8 Max planes., which ply short regional routes. I have always wanted to experience their long haul business class product with the widest seat compared to their other seat configurations.

Singapore Airlines regional business class aboard the A350 and B787 variants. (Screenshot from Singaporeair.com)

Business class on Singapore Airlines’ A-380.
My business class experience started from the British Airways Lounge, which is located one floor up the departure gates in Newark Airport Terminal B. The food varieties were pretty basic and I had fruits and yogurt for my breakfast as I was looking forward to enjoy my book-the-cook meals on the plane. Nevertheless, the lounge is quite spacious and offers stunning views of the tarmac for plane spotting. It seemed SQ passengers were the only group of customers in the lounge at that time, probably due to it being one of only three flights that the lounge is catering for in the morning. SQ return flight to Singapore departs daily from Newark Airport at 9.35am. I did not need to worry of missing my flight because the lounge staff will make an announcement to ask passengers to proceed to the gate for boarding, which only took about 5 minutes to get there.

The view of the tarmac inside British Airways Lounge at Newark Airport Terminal B.
Singapore Airlines operates the A350-900 Ultra Long Range planes between Singapore and Newark sector. The other sectors that use the same plane type are to San Francisco, Los Angeles and New York (John F. Kennedy). It only has two classes of travel - business and premium economy. New York is served generally by three airports - John F. Kennedy (JFK), LaGuardia and Newark. JFK and LaGuardia are located in Queens whilst Newark is located in New Jersey. In terms of convenience, flying from JFK makes more sense as it is nearer to Manhattan than Newark. On the other hand, Newark offers a quieter and faster immigration clearance than JFK since lesser people would go there.
The whole SQ business class experience truly began once I stepped onto the plane. My seat was at 10A a bulkhead seat, which offers much better legroom compared to other seats in the business class cabins. There are a total of eight bulkhead seats, four of which are aisle seats and the rest middle seats. They are usually reserve for the airline’s priority customers like PPS club members, as well as passengers travelling with a baby. But surprisingly, it was available to select online at the time, when I was reserving my seat. One possible theory is it is very close to the business class galley, which turns into a hive of activities when the meal service starts. The crew pulls out the curtains after take-off but it is not soundproof. It didn’t bother me much as their noise cancelling headphones works wonders.

One of eight bulkhead seats on the plane.
The service started with a welcome drink - a selection of water, cloudy apple or orange juice. I chose the cloudy apple juice. A leading stewardess came to my seat to confirm the two meals I have pre-booked via the book-the-cook - pan roasted veal cutlet and slow roasted beef fillet, and my preferred drink on this flight. I would strongly recommend to pre-order your meals cause you would usually be the first group of passengers to be served. Between the two book-the-cook option, I loved the pan roasted veal that was very juicy and tender. It also came with an assortment of mushrooms and vegetables. Dessert choices were cakes, fruits and ice cream. I chose the last option and it was ready to eat, which was very much appreciated because you usually have to wait quite awhile before you can start digging into it.

Pan roasted veal cutlet pre-booked using the Book-the-Cook service.

Slow roasted beef fillet, which could also be pre-booked via the Book-the-Cook service.
During mid-flight the lead stewardess came to offer a variety of snacks, but I was thinking of noodles and decided to ask her if she could offer me instant cup noodles instead. After about 10 minutes, she came over with a bowl of noodle soup with slices of chicken, a stalk of kai lan and corn. It also came with asian style chili condiments and a glass of water and apple juice. It warmed my stomach and I felt very comfortable after that.

Requested an instant cup noodles and was not expecting to receive this.
The seat configuration does not become fully flat and in order to make it into one, I have to flip the back seat down, which also reveals the blanket, pillow and the bed. It was very easy to set it up by myself and I was lying flat on the bed in no time. Since it is a bulkhead seat, I did not have to squeeze my legs into the footwell underneath the TV screen, and have lots of freedom to move around. During the mid flight meal and last meal before landing, I could easily have my meal on the tray table that could be adjusted up and down and towards or away from my seated position. Together with the plushy pillows, I sat comfortably on my fully flat seat having my meals and watching shows on the 18-inch screen. I managed to sleep three times during the flight, each time about 2-3 hours. Having had the opportunity to experience SQ’s A380 business and regional products prior to this one, the long haul product is my favourite.

The business class lie flat bed on the A350. One has to flip the back seat over to reveal the bed. (Photo from HeadforPoints.com)
Overall, my business class experience has been exceptional. In my opinion, there are three things that separates SQ from the other airlines - customer service, people and image. Customer service is the most important one among the three. This is the most direct connection that customers can enjoy the airline’s well curated suite of services. It can be meals, beverages, remembering your last name and checking your preferences, turning off the seat lighting if you doze off or resting, and if you are traveling with a kid, how they could make them feel comfortable traveling in a confined environment over a long period of time. Second, SQ steward and stewardesses are willing to go the extra mile to make your time with them a special one. Even though I’ve asked for a simple instant noodles, I was not expecting the lead stewardess to prepare a bowl of noodles with extra toppings. I thought she was very kind and thoughtful, which also left me with a very good impression of the airline. Lastly, the uniform and unique image of the steward and stewardesses gives customers a sense of consistency and familiarity. Unlike other airlines which allow their stewards and stewardesses to change into a different uniform for cabin services, SQ standard uniform design seems to allow stewardesses to work just as efficiently. More importantly, their kebaya uniforms allow customers to immediately identify them from SQ.
Personally, it gives me a sense of home away from home and to others who are not residence of Singapore, a feeling of exceptional service to be expected from SQ. Thus, I feel specially seat features is secondary; the current seat design has been around for more than 10 years but SQ has always been consistently ranked in the top two airlines in the world.
Go and experience Singapore Airline’s business class product at least once, when you have the opportunity.

Real pain of applying for the Malaysia VEP (Finale)
Finally, after three months of pain, I have managed to get my VEP and activated it.
If you have happen to land on this page but have not started the VEP application at all, I would like to invite you to go to this page first.
On the other hand, if you have submitted the VEP application but yet to be verified by the Road Transport Department (JPJ) and TCSens, which is the appointed vendor issuing the VEP tags, please go to this page first.
I will share with you how I completed the final stage of the application. This blog will be most relevant to drivers who opted to have the VEP tags shipped to them.
From my previous blog post, I shared that the only thing I could do was to wait for TCSens to shipped my VEP tag to me. That was about a month ago from the date of this blog post. Considering the large volume of applications that they have received since the mandatory VEP announcement back in May 2024, I would not be surprised it would take a long time for them to process my tag.
From the payment successful email, it explained the tag will be shipped out in the following 10 days. However, this is not accurate at least during this peak period.

You will receive a payment notification email after making payment.
In my case, the whole process took close to five weeks. First, it took about three weeks for them to get the tag processed, whereby a tag serial number would be generated. You can check this by logging into the JPJ VEP registration website. Under the manage vehicle list, you will notice the Tag button is clickable.

The Tag button will become clickable when they have processed a tag for the vehicle.
Once you click on it, another window will pop up and it will indicate your tag serial number and its expiry date, which has a five year lifespan regardless of your vehicle’s COE expiration date.

A tag number will be displayed once they have processed a tag for you.
Therefore, in my case, my 2nd hand vehicle, which has three years left in the COE would outlast my VEP. By then, I will need to register for a new VEP for the next car (if I still choose to drive).
Second, TCSens uses City-Link Express to deliver the VEP tags. You will receive an email from TCSens to inform you the tag has been shipped and a consignment number will also be indicated.

Use the consignment number to track the tag delivery.
From here, you can use City-Link Express tracking page to track your tag shipping. It would take another week and a half for them to pick up the tag from TCSens. Thereafter, it would take another week or two to have the tag delivered to your door. In my case, it would take another nine days for the tag to be delivered to me.

This tracking page shows you the duration it took for the courier to pick up and deliver the tag to me.
25-Oct update: According to an article from The Straits Times, you can now request to Citi-Link Express to collect your tag at their office in Singapore. You will still need to track the tag progress from the Citi-Link Express tracking page. After it has arrived at the Singapore’s office, you can email to customerservice@citylinkexpress.com.sg with your full name and address, including the tracking number, to make an appointment. Once they have received and acknowledged your request, you can go down to the office at 1004 Toa Payoh North#02-08/09/10, Singapore 318995.
Do take care not to bend the package, as the RFID tag is fragile. Unlike drivers who have chosen to collect the tag at Danga Bay or the other two centres meant for those who have made an appointment, the tag comes in the form of a transparent sticker with a RFID across it.
Third, you have to go back to TCSens webpage to acknowledge you have receive the tag. Under vehicle list page, click on the acknowledgement button on the right.

Click on the Acknowledgement button on the right to begin the tag fitment verification process.
Depending on your screen, you may have to scroll to the extreme right to see the button. Proceed to enter the serial number found above the barcode on the VEP tag card and click the validate button. You should see a green bar indicating you have entered the correct tag serial number. Thereafter, click on the continue button to proceed to the next step.

The serial number is found above the barcode.

Enter the tag serial number found on top of the barcode of the VEP card and click validate.

Click continue after validation is successful.
Fourth, the following step will have a clip about VEP and the tag fitment procedures. To save you the trouble from watching the entire clip, I will share a three step process to affix the VEP tag and get it approved and activated as soon as possible.
Step one, this transparent tag type has to be affixed onto the left side or the passenger side headlamp.

This is how the transparent RFID tag looks like.
While there are anecdotes of drivers using other methods to fit the tag on other than the headlamp, I will only share the recommended way in my blog. Before affixing the tag, use a wet tissue or damp cloth to wipe clean the surface of the headlamp. Wait for around two to three minutes for it to dry.
Step two, always make sure to affix the tag on the flat surface of the headlamp, while keeping it a distance of at least 5 cm away from any metal surface around the lamp. Thereafter, carefully peel off the RFID from the clear plastic and affixed it onto the lamp. Apply a bit of pressure on the surface of the RFID to make sure it is properly affixed onto the lamp.

This is where I have affixed the RFID tag onto my vehicle left/passenger headlamp. Make sure it is on the flat surface of the lamp and 5 cm away from any metal surface of the car and lamp.
Step three, take a photo that must show both the left headlamp and your car plate number.

Ensure the car plate number and the left/passenger side headlamp are visible in the photo. Do not redact the car plate number like what I have done here. Doing so will not get your fitment verification approved.
Once done, upload the photo under step three of the VEP tag acknowledgement page and click submit. While you would think the RFID may not be visible from the photo cause it is transparent and small, I guess TCSens staff will zoom in on the photo to make sure it has been affixed properly.

This would be the last step in the VEP fitment verification. Click submit after uploading.
You are finally done! Now, you just have to wait for TCSens staff to validate the fitment. At this stage, the status in the vehicle list would show Tag issued but not activated. From what I have read, it would take up to 24 hours for it to be activated. In my case, it took only about an hour or so. The status will change to Tag issued and activated. You will also receive an email from TCSens to inform you that it has been activated.

You will receive tag activation success email if the photo taken and RFID fitment were done correctly.
You can also find the notification in your Touch’N’Go app, under your Inbox > Activities.

The same notification can also be found in your Touch’N’Go app under Inbox > Activities.
From now, you do not need to use a physical Touch’N’Go card to pay for the road charge of RM20 at the Malaysian customs. Similar to our ERP, you can also use the RFID lane at the toll booth along the expressways in Malaysia. Most importantly, we now have to make sure we always got enough Ringgits in our Touch’N’Go e-wallet, as the monies will be deducted from there. However, I would recommend to keep a physical card with you in case there are unforeseen issues with the RFID.
Phew… it felt like a marathon to get the VEP approved and affixing it onto the car. I hope you found my blog posts regarding the VEP application process informative and useful. Hopefully, your VEP journey will not be as painful as mine and it would be sorted out soon.

Real pain of applying for the Malaysia VEP Part 2 (updated)

TCSens is appointed by Malaysia's Road Transport Department to handle verification and issuance of VEP tags. (Screenshot from Google Maps)
If you are reading this blog, congratulations on making to this stage of getting your VEP tag.
In my previous blog, I shared the steps to register a VEP account and entering the correct registration details. If you have not done so, I invite you to view this blog post first.
You would have received a confirmation email which asks you to go to this website https://vepams.jpj.gov.my/ to verify the details that were submitted on the VEP website. From here, I will share the process to complete the VEP registration on the vendor’s portal.

An acknowledgement email will be sent that will ask you to continue the application on the vendor's website.
After you are on the vendor’s portal, use the same login details from the VEP website to access the vendor’s portal.

This is how the login page to access the final stage of VEP tag application
You can view the list of registered vehicle in your account. You might need to scroll to the right side and so that you can see the Action column.
Firstly, you will be brought to Vehicle list page with your vehicle entry listed. Click on the button under Action, which is located on the right side of the screen. You may need to scroll to the right side to see it.
Thereafter, you will need to review the same entries which you have verified earlier on the VEP website again. Do take note to make sure all the supporting documents have been attached inside this application. These are the NRIC front and back, the LTA log card and the vehicle insurance. Once you are satisfied with it, you will need to acknowledge you agree to the terms and conditions (T&Cs) on the use of VEP tag and linking your existing Touch’N’Go e-wallet to the VEP system, which is one juncture that in my opinion could be a pain point for some drivers.
Secondly, the VEP system is supposed to not only keep track of your car’s entry and exit through Malaysia’s customs, it is also being use to deduct the Road Charge of RM 20 (SGD 6.10), when you enter Malaysia’s borders. Currently, we are using the physical Touch’N’Go card to pay for it. So when the VEP is officially enforced from 1st October 2024, we will not need to use the physical card and instead, it will deduct that charge from your Touch’N’Go e-wallet via the VEP tag. I would assume majority of drivers already got a Touch’N’Go app with an e-wallet activated since you would need it to topup the new Touch’N’Go cards that are NFC enabled. If you have not done so, setting one up is much easier than registering for the VEP tag. Go to App Store or Google Play store to download the Touch’N’Go app and follow the instructions in the app.
I would like to explain why it could be a pain point for some of us. The Touch’N’Go is ultimately a Malaysia payment system so for Singaporeans, we do not have a Malaysian IC to register and instead, we can only use our passport number or Singapore mobile number. On the other hand, we would have use our NRIC to register for the VEP. Hence, there will be a mismatch of data between the VEP system and Touch’N’Go. You would know you got this issue when during the verification process at the last step on the vendor’s portal, it tells you the application cannot be completed until you resolve the mismatch in data from your Touch’N’Go account. You may ask how would they know you got a Touch’N’Go? I suspect it could be from your full name and mobile number. Then you may ask, how am I going to resolve this? Not to worry, I will share how it can be done.
Recently, Touch’N’Go has made it easier to change our particulars in the app. Here is how it can be done.
The first step is to go to Touch’N’Go app and scroll down to the section where My Favourites section.

Scroll down to My Favourites and tap on More.
Second step, type VEP into the search field at the top.

Search for VEP in the search field.
You should be able to see VEP JPJ after you press enter.
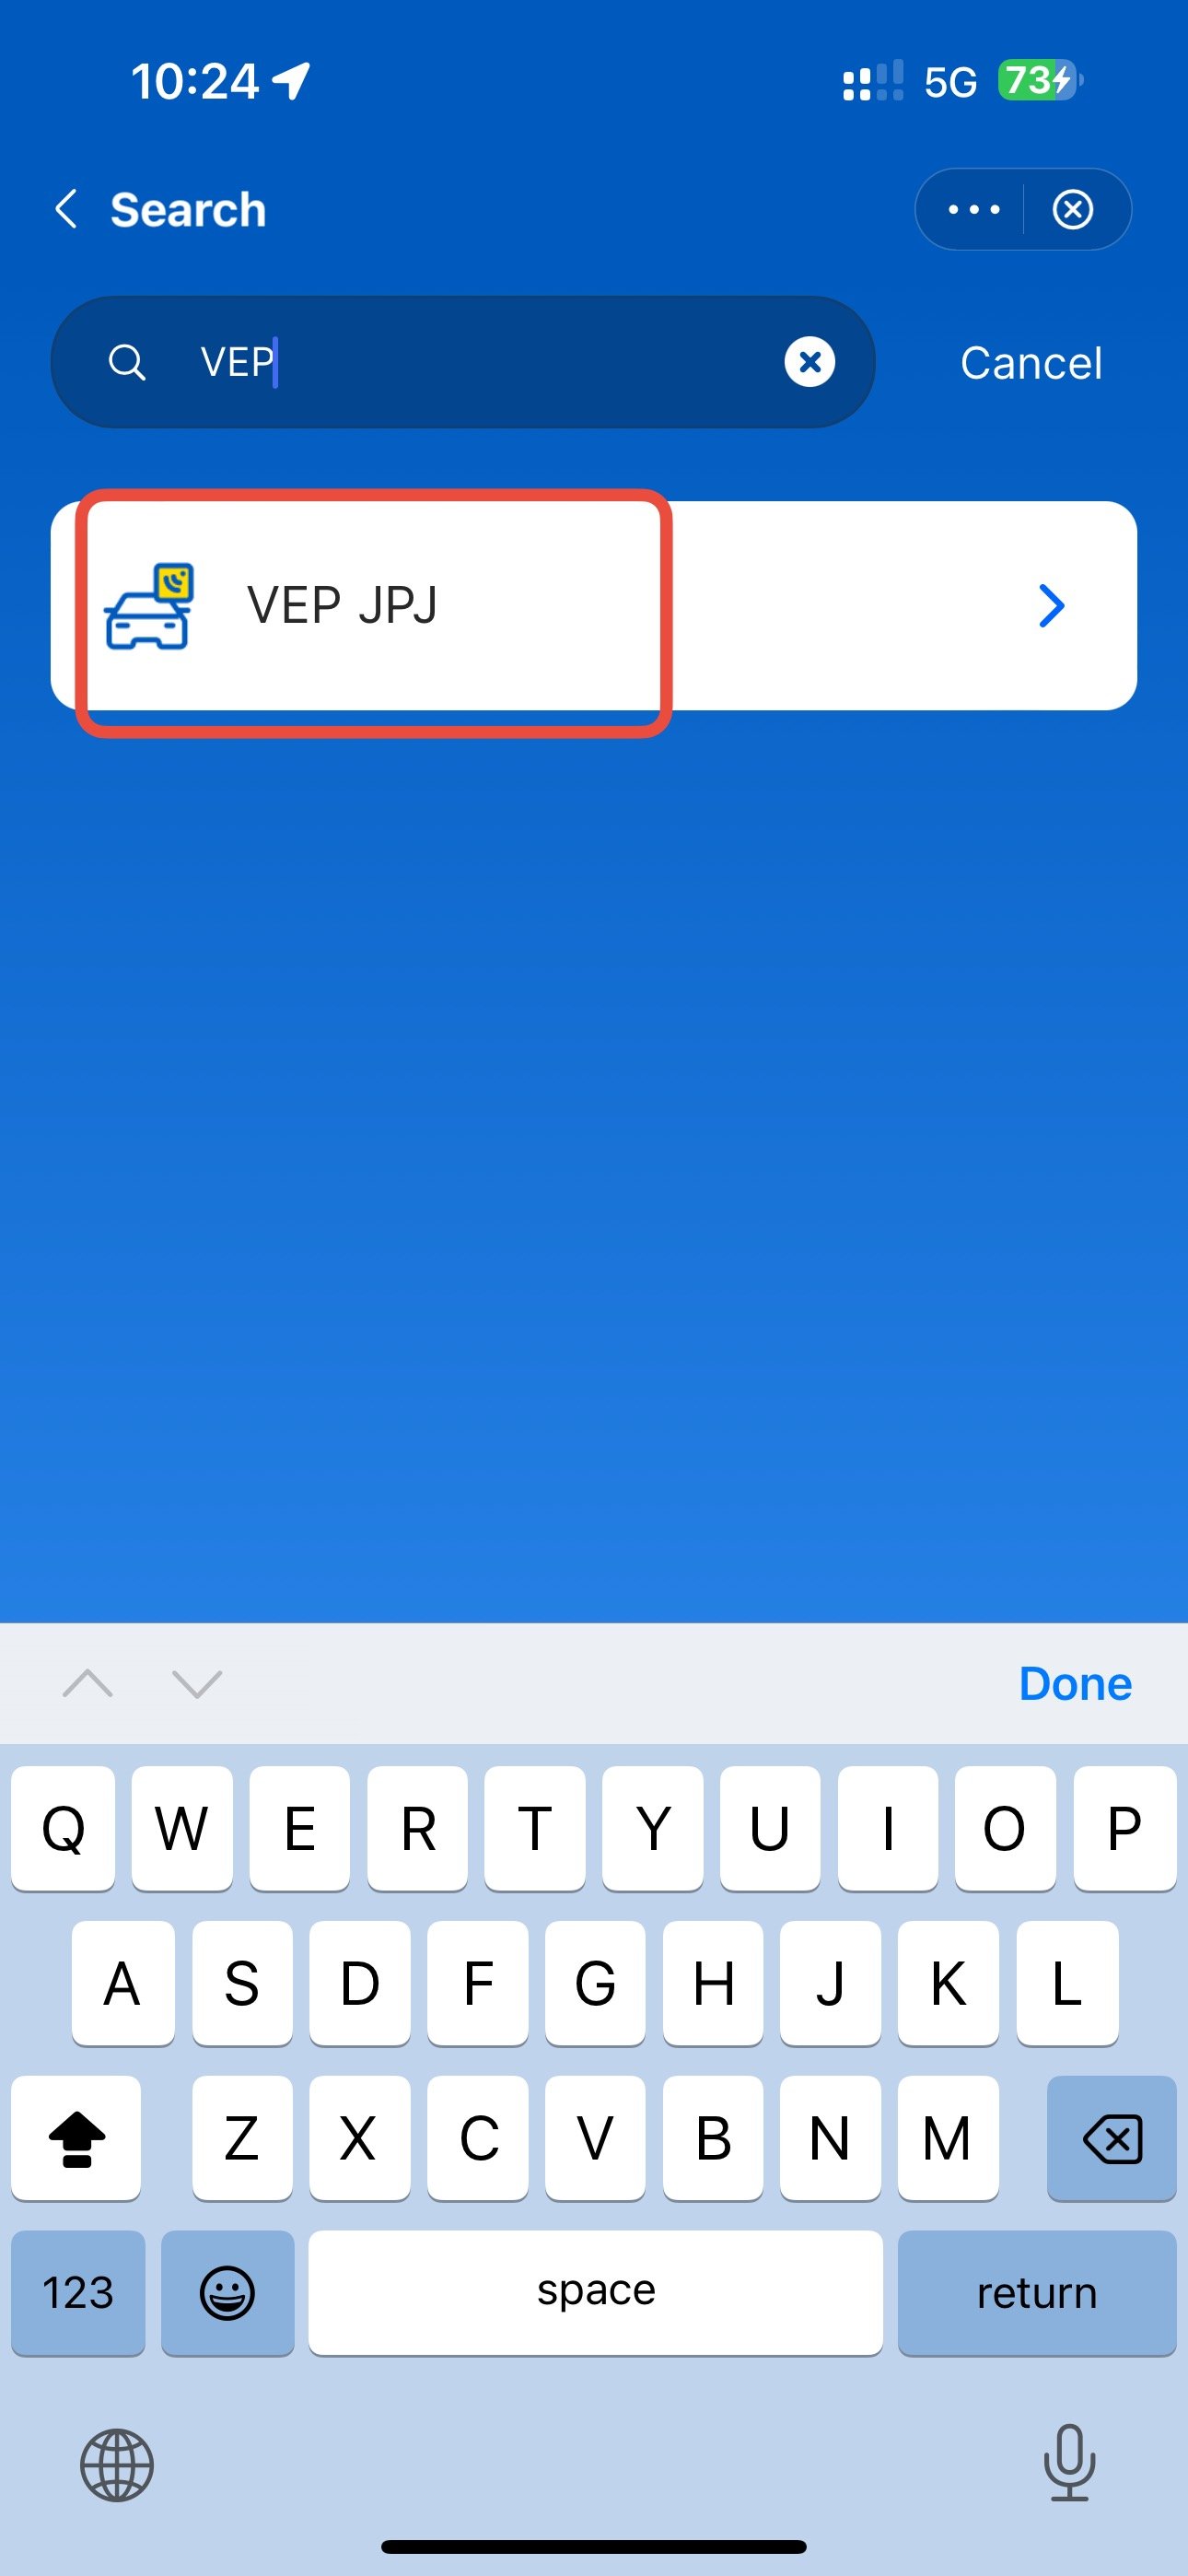
You should see VEP JPJ after searching.
And for the last step, key in your NIRC number, tick to consent to sharing your personal data with Touch”N’Go and Road Transport Department of Malaysia, and tap the Submit button on the bottom of the screen. This process is much easier compared to the previous method of chatting with an agent and resolving the issue in the Touch’N’Go support page.

Update using your NRIC, which should be the same as the one you used to register for the VEP.
Once the Touch’N’Go issue have been sorted, the vendor’s system will process your application and it will be under pending verification stage. If you make sure the registration details are in good order, your application should proceed to the payment stage within a week or so. In my case, my application was delayed for more than a month, as I got my effective registration date wrong. Hence, please make sure everything is correct from the first instance. You may refer to Part one of this series, where I explain how to make sure the information on your LTA log card are entered correctly on the VEP website.
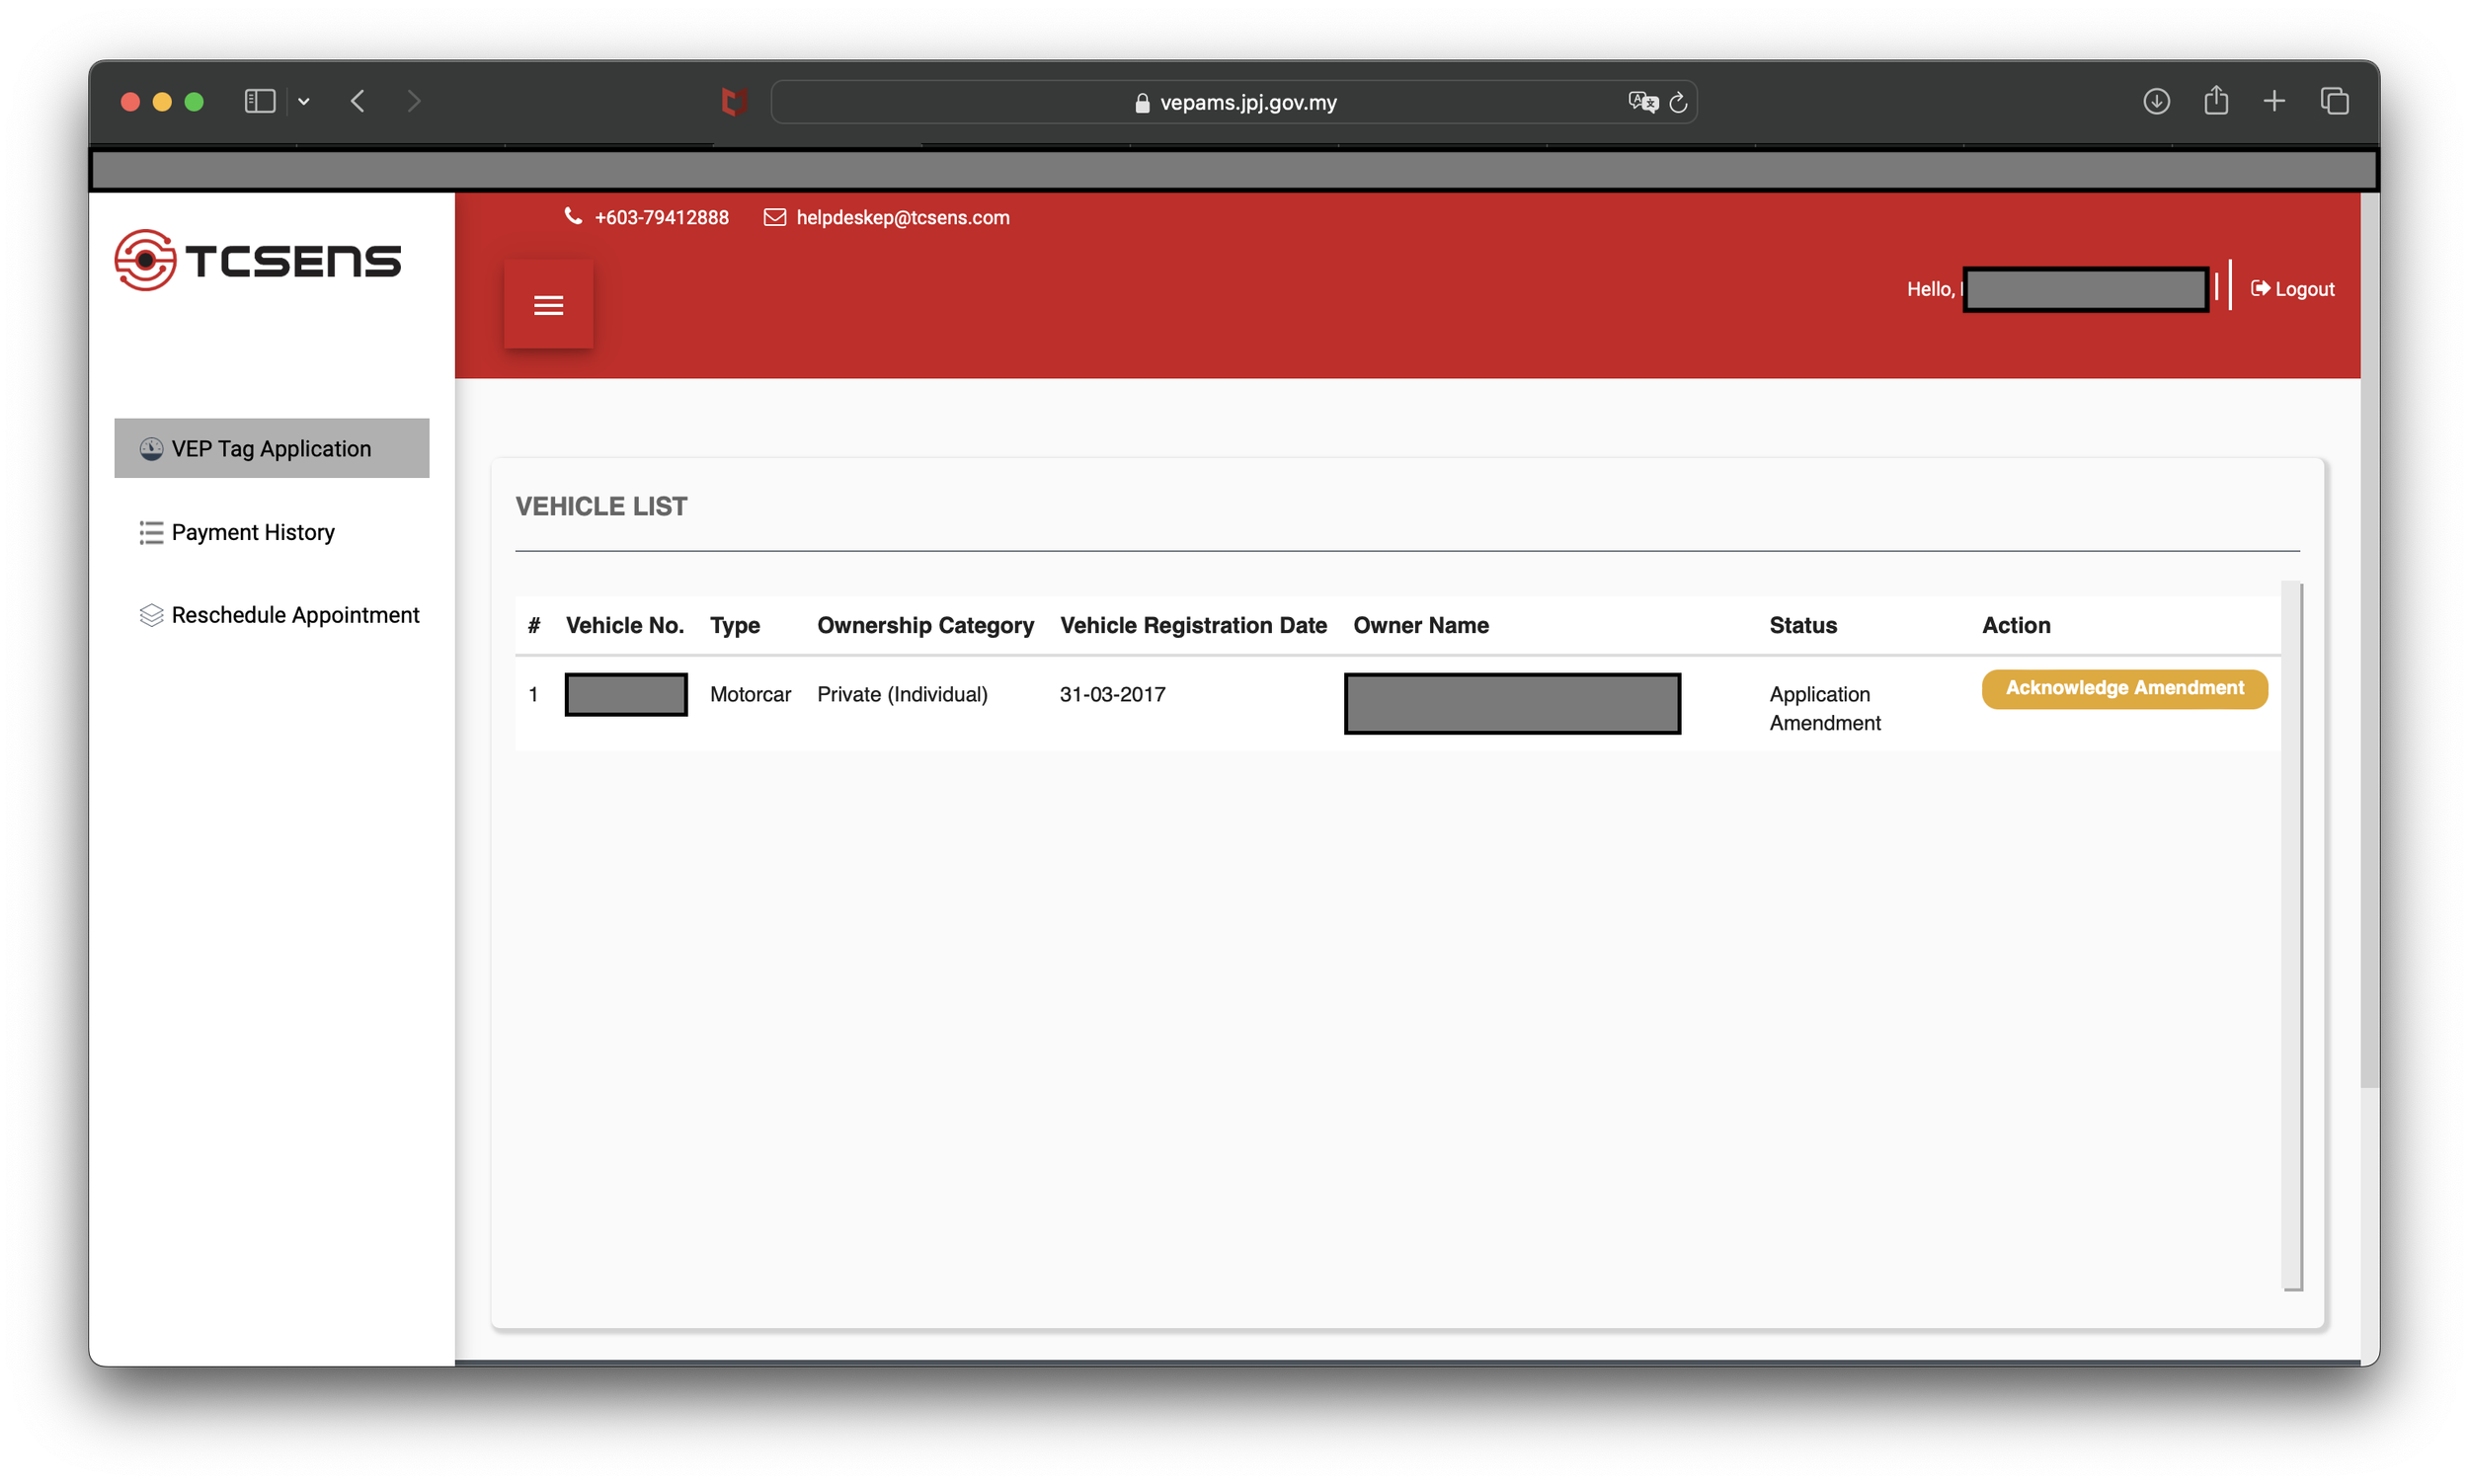
Thirdly, you will receive an email to inform your application has been verified. In my case, I finally got my amendment acknowledgement after a month or so.

An information pop-out informing drivers are required to pay an additional SGD39 to pick up the parcel.
Fourthly, go back to the vendor’s portal to choose the mode of getting the VEP tag, which will determine how much to pay.

There are three options available for the VEP tag to reach you..
There are three options, in person at either of the two VEP office in Danga Bay in JB and Woodlands in Singapore (SG), and postage. Collecting in JB costs RM39.50 (VEP fee RM10 and Service fee RM29.50). For collection at Singapore office, you will need to pay an additional SGD39 on top of cost if you collect in JB. For postage, its RM39.50 plus RM14.42 postage. In total, choosing postage option will cost RM56.28 (inclusive of 6% SST).

The only option available to me at the time of writing this blog.
I have chosen the last option because I have tried both JB and SG collection options but the appointments were all taken up.

An acknowledge email with the payment confirmation will be sent to you as well.

After a week, the status of my VEP tag delivery is still Pending for Tag Processing.
According to the acknowledgement email, it supposed to send out the VEP tag within 10 days, which I have assumed it is referring to a working day. It has since been six working days and the status of my VEP tag is Pending for Tag Processing (sigh..).

It takes within the next 10 days after successful payment to have the VEP tag to be delivered to me.
Well, there is nothing much I could do at this moment. The only thing I could do is to wait or send an email to their help desk to bring to their attention of my yet to be delivered tag.
The real pain has not ended for me and I shall update with a part three of my VEP application experience.